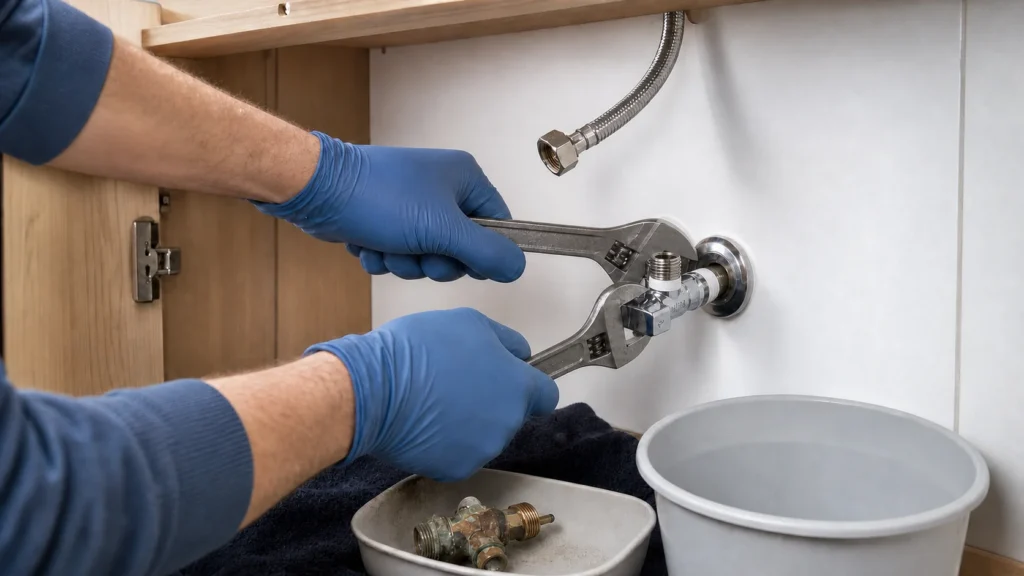
Over time, a shut-off (angle) valve under the sink or toilet stops sealing or gets stuck so it can no longer be closed – which is precisely when you need it most. Replacement is a logical intermediate step in home plumbing: it is done on the thread, with Teflon tape and two tools. Since you are replacing the valve itself, before starting you must close the main water supply for the apartment or house and release the pressure at the nearest faucet.
You need basic experience with threaded connections and Teflon tape; be sure to close the main water supply first, because the shut-off valve you are replacing no longer protects you.
⚠ Safety note: This guide involves working with plumbing. If you're not completely sure about every step, stop and call a licensed professional. Before you start, always switch off the power at the breaker or close the main water/gas valve.
1 Close the main water supply
Since you are replacing the shut-off valve itself, the supply to it must be cut off at the main line or the shared valve for that room, because the valve you are replacing cannot shut itself off.

2 Release the pressure and prepare the workspace
Open the faucet or pull the flush to release the remaining pressure, and place a bucket and cloths under the workspace because water from the pipes and the old valve will drain when disconnected.
3 Disconnect the hose and unscrew the old valve
Hold the pipe with one wrench so you do not twist or crack it (especially if it is a copper or old galvanized pipe), while unscrewing the old valve from the pipe with another wrench.
⚠️ Warning: Old galvanized or copper pipes can be brittle – if you feel great resistance when unscrewing and fear that you will crack the pipe in the wall, stop and call a plumber, as repairing a cracked pipe inside the wall is a much more expensive job.
4 Clean the thread on the pipe
Remove the remains of old hemp or Teflon and scale, and check that the thread on the pipe is not damaged.
5 Wrap Teflon tape and screw on the new valve
Wrap tape or hemp with paste in the direction of the thread, then screw on the new valve by hand and tighten with a wrench until it is firm and aligned so that the lever is in a comfortable position for opening and closing.
? Tip: You can recognize a ball valve by a single lever that turns 90° – when the lever is parallel to the pipe, the valve is open, and when it is at a right angle, it is closed; they are much more reliable than old wheel valves.
6 Connect the flexible hose
Connect the hose (preferably a new one) to the new valve, tighten by hand, then gently with a wrench.
7 Slowly open the water supply and verify
Check the tightness of all joints and test that the new valve smoothly closes and opens the water flow.
Final check
- The main supply is slowly opened, and the threaded connection of the valve on the pipe remains dry after wiping with a paper tissue
- The valve closes and opens smoothly, and when closed, the water at the faucet/cistern stops completely
- After a few hours, check the valve joint and the connected flexible hose – everything dry, no drops in the bucket below
Common problems
- The new valve leaks at the thread to the pipe
- Too little Teflon or it is wrapped in the wrong direction. Unscrew the valve, remove the old Teflon, wrap 8–12 turns in the direction of the thread winding (clockwise looking from the end of the pipe) and screw it on again – the valve should fit firmly, without wobbling.
- The old valve unscrews, but the whole pipe turns with it
- Stop immediately so you do not pull or break the pipe in the wall. Counter-hold the pipe with pipe wrench as close to the wall as possible and hold it still while unscrewing the valve with another wrench; if it does not go, spray with rust remover, wait, and try again.