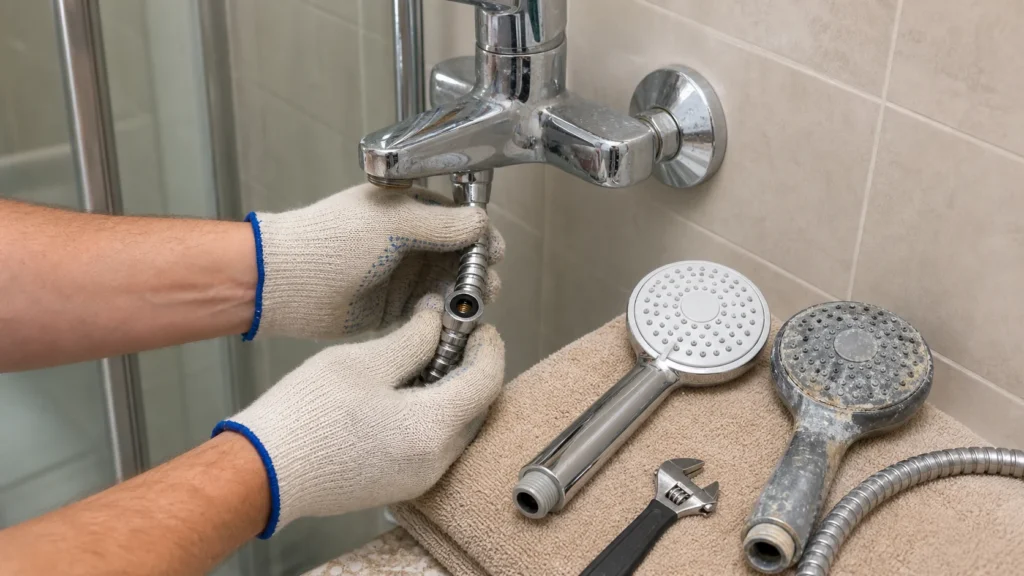
A shower head full of scale and an old hose leaking at the connections spoil both the pressure and the desire to shower, and replacement is literally a ten-minute job. The connections are standard (1/2 inch), so a new hose and head fit almost any faucet. Before starting, close the shower shut-off valve if you have one, or simply keep the mixer closed – and put a cloth in the drain so the gasket doesn't escape into the siphon.
n
No prior knowledge is required – connections are unscrewed by hand or with a light tightening of the wrench over a cloth so as not to scratch the chrome.
n
⚠ Safety note: This guide involves working with plumbing. If you're not completely sure about every step, stop and call a licensed professional. Before you start, always switch off the power at the breaker or close the main water/gas valve.
1 Close the shower shut-off valve
If there is a separate shower valve, close it, or stop the water supply at the main bathroom valve before disassembly, so that no one accidentally turns on the water while you are working.

2 Put a plug or cloth in the drain
Small parts and gaskets easily fall into the tub or shower tray drain, so it is good to plug it temporarily and prepare a dry cloth.

3 Unscrew the old shower head
Turn it counterclockwise by hand or using a wrench wrapped in a cloth.
⚠️ Warning: Always wrap the wrench in a cloth or use a wrench with protective jaws – chromed surfaces are easily and permanently scratched by metal tools.
4 Unscrew the old hose (if being replaced)
Loosen it from the mixer tap (shower valve) side in the same way, holding the valve with another wrench so you do not twist it.
5 Inspect the gaskets and wrap Teflon tape
Replace worn rubber gaskets on both ends, and wrap Teflon tape on classic threaded connections (not quick connectors).
6 Thread the new hose and head
First by hand completely, then tighten with a wrench wrapped in a cloth for another half-turn – no more, so you do not damage the gasket.
? Tip: If the shower head gets scale problems over time, detach it periodically and soak it in a mixture of water and vinegar for about 30 minutes – it extends its lifespan.
7 Open the water and verify
Check for leaks at both connections, as well as the strength and pattern of the spray; if it drips, tighten gently.

Final check
- Turn on the water and run the shower for a minute – both ends of the hose (at the tap and at the head) remain dry when you wipe them
- The spray from the new head is even on all holes, without spraying to the side
- The cloth or plug has been removed from the drain and water from the tub/shower tray drains normally
Common problems
- The new hose connection leaks at the mixer
- The rubber gasket fell out, the old one remained in the thread, or it is pinched sideways. Unscrew the union nut, remove any old gasket, insert the new one straight into the nut, and tighten by hand, then at most a quarter-turn with a wrench over a cloth.
- The old shower head or hose cannot be unscrewed due to scale
- Wrap the joint with a cloth soaked in vinegar and leave it for 20–30 minutes to soften the scale, then unscrew with a wrench over a dry cloth. Use your other hand or pliers to counter-hold the mixer so you do not strain its connection.